Using features of Webstore 2.0 to implement a product page FAQ panel.
Shopify Webstore 2.0 implements a suite of new features, some of which you might be familiar with if you’ve worked with themes directly. This guide shows you how to set up individual FAQ sections in your product pages. You’ll also learn how your Shopify content authors can edit them using native features of Webstore 2.0, without the use of apps.
Getting metafields set up
You can now access and configure metafields from the Shopify menu (previously, you needed to use apps or tricky URLs). To set up metafields, within Shopify, click on Settings (bottom left) and from the new menu select Metafields. You should see this:
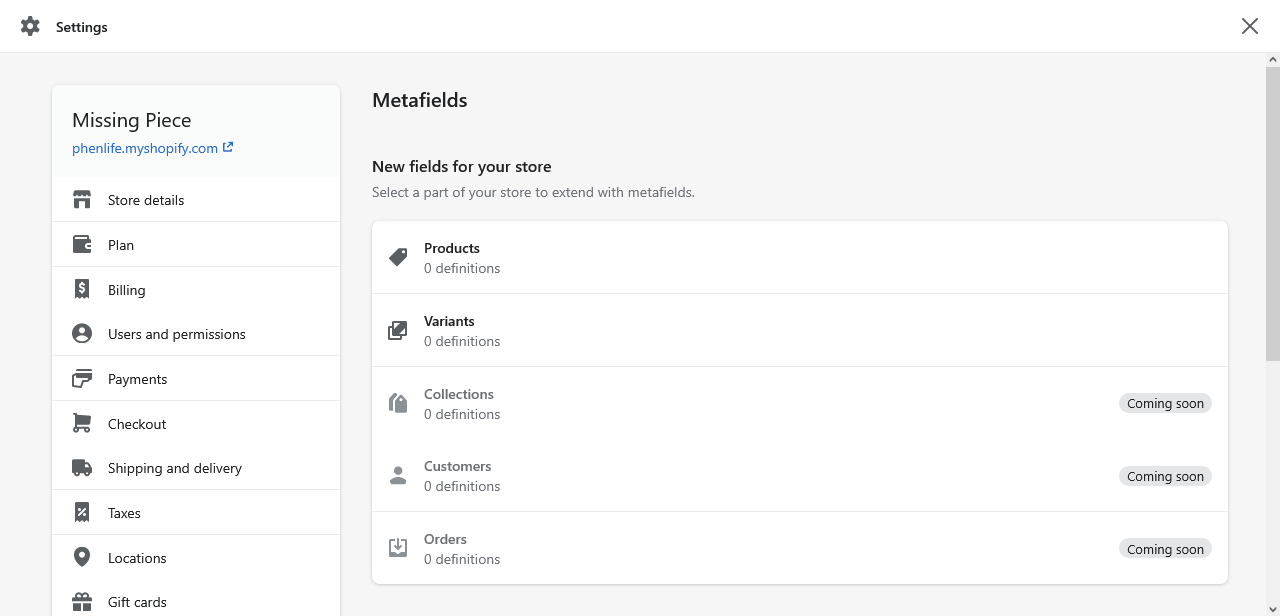
At the time of writing, metafields are only available on products and product variants. Click on Products:

Unfortunately, the whole concept of blocks (which we’ll cover later) doesn’t extend to metafields. This means we’ll need to know the maximum number of questions and answers each product will support in advance. While it’s possible to add more questions and answers later, this will lead to a slightly ugly interface for your Shopify users.
Add the metafields via the interface in the wrong order, so they appear in the correct order for your Shopify users. For example, if you want to allow up to 10 questions and answers, the first metafield you need to add is the answer to question 10:
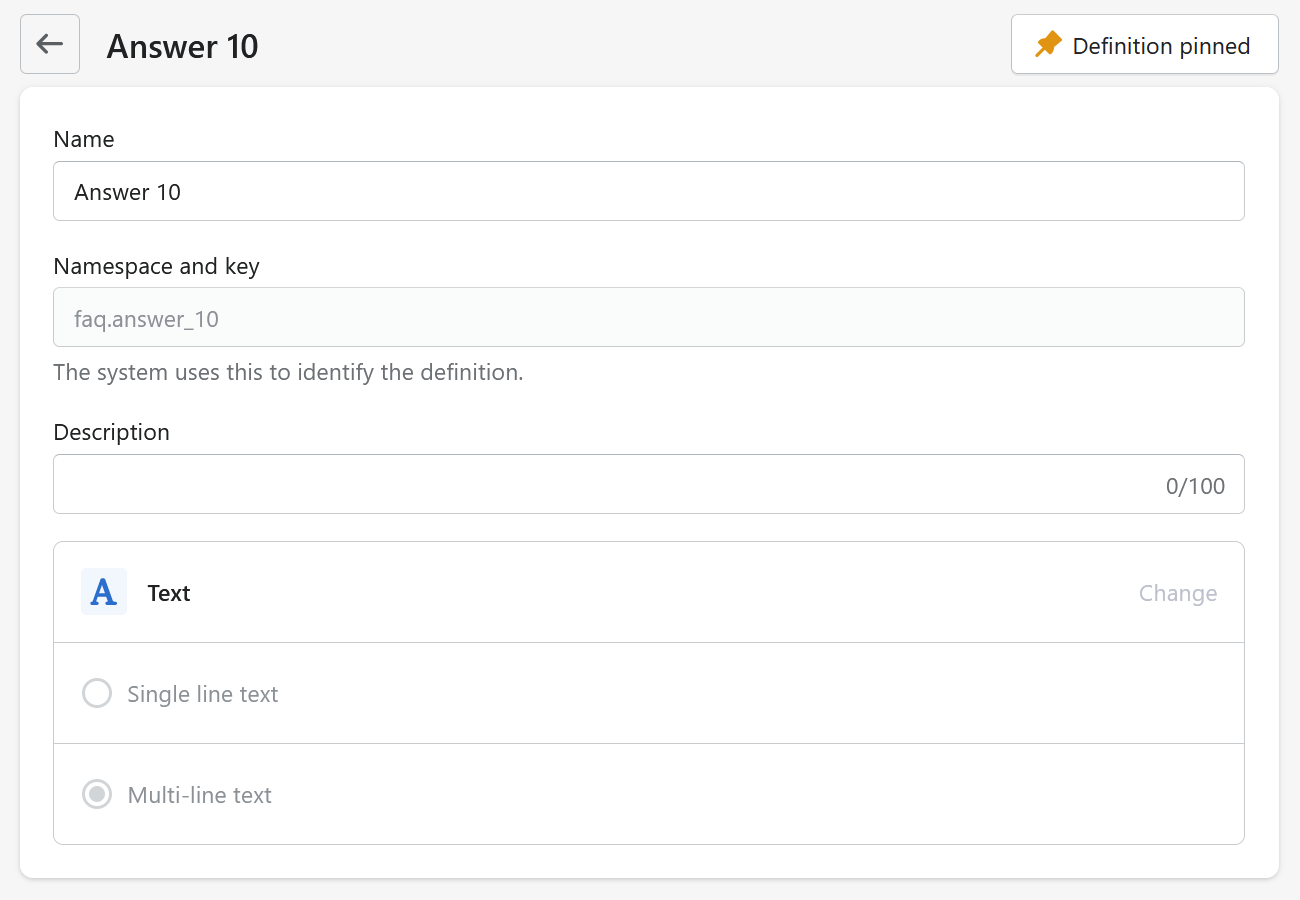
Namespaces are useful for organising groups of data into categories. I’ve used faq in the example above.
Notice that text fields come in two flavours: big and little. This becomes relevant much later when we’re attaching these dynamic data points to the customisation options in Shopify. The data type of the metafield needs to match what the Shopify template expects.
The lower half of the metafield form gives additional options. For example:
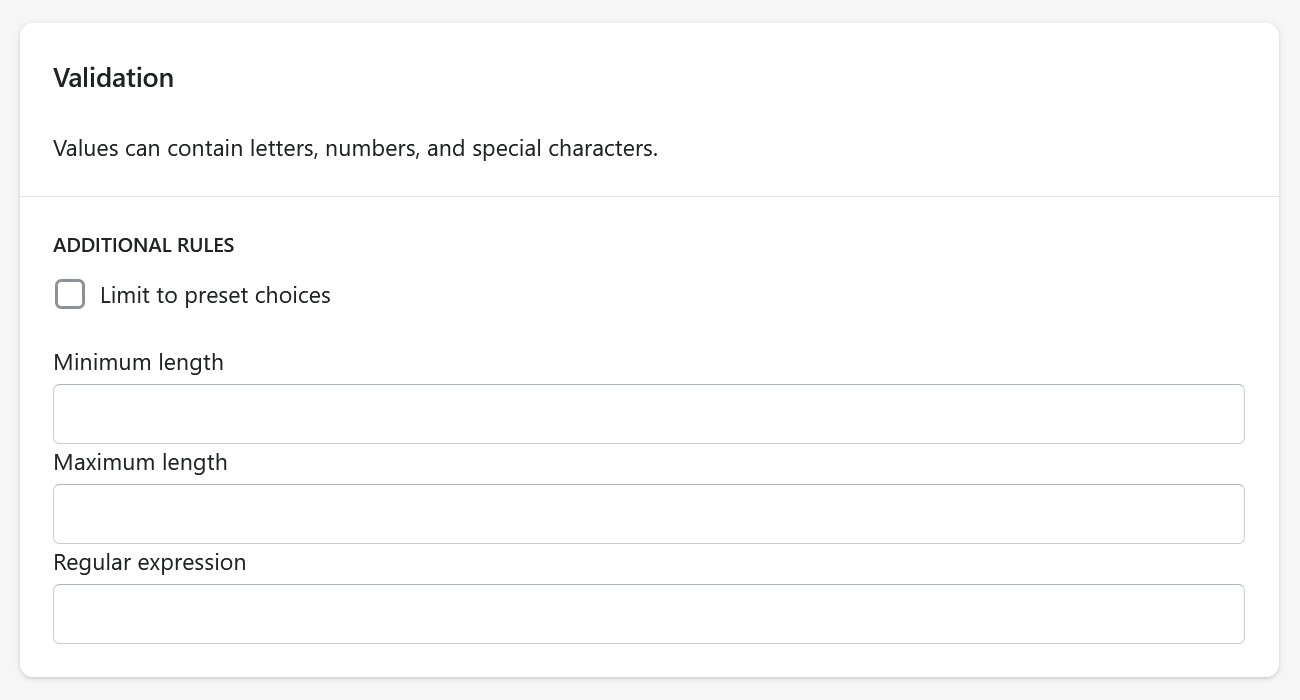
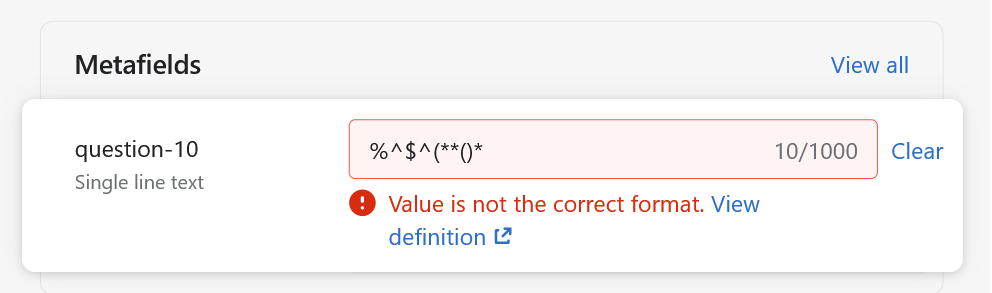
You can add regular expressions to limit what input the user can provide. These don’t seem to be HTML5 pattern attributes, but are run server-side and if your Shopify users break them, they’ll get a message only after attempting to save:
Not especially useful for our purposes, but good to know.

Populating metafield content
Visit a product within Shopify, scroll to the bottom and you should see your new metafields appearing:
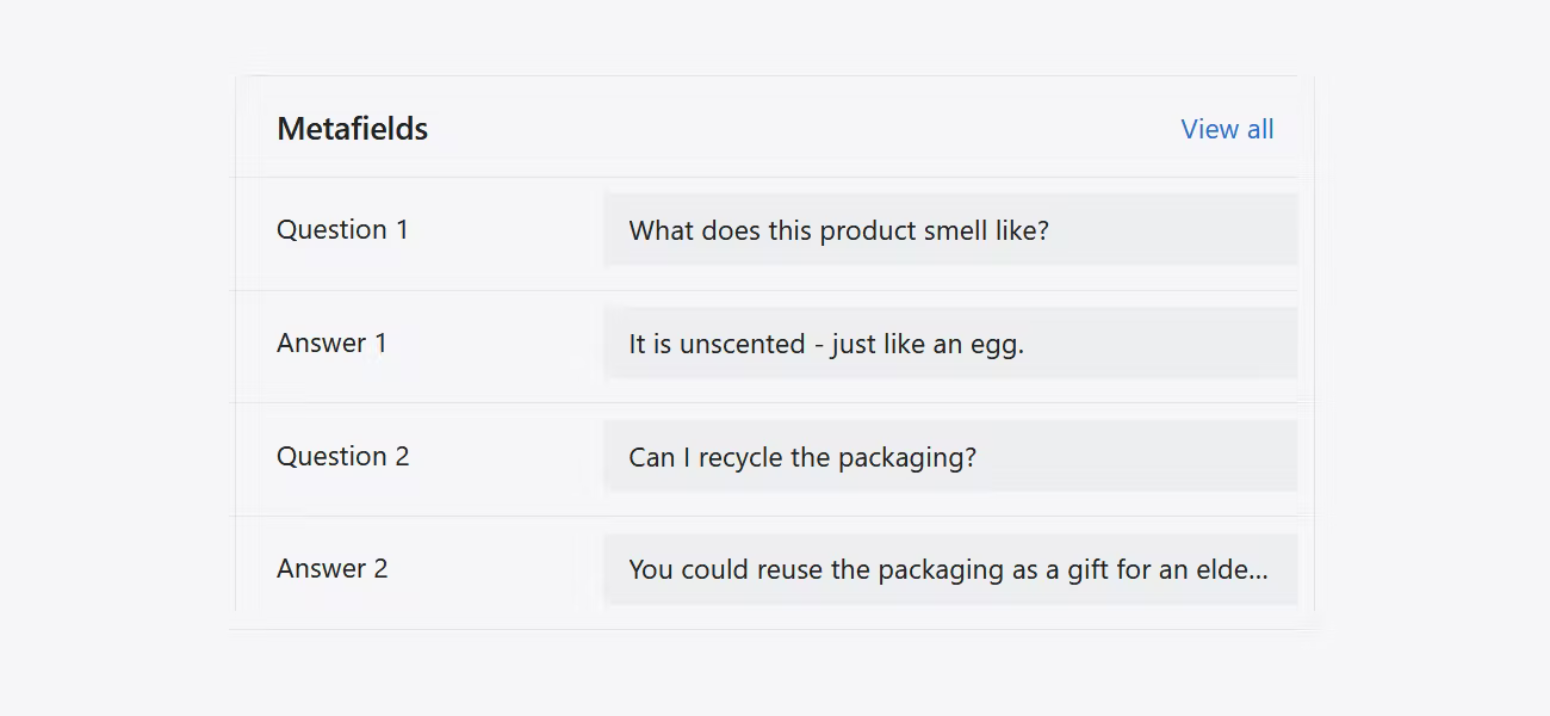
Note that the data we’re setting up here is specific to individual products. Much of the headline features of Shopify Webstore 2.0 refers to features which are applied globally to every instance of a particular content type. We’ll use this to our advantage a little later.
Populate one of your products with FAQ content. We’ll need some data to test our code later.
Creating an FAQ section
We could build logic at this point to check metafield data and include product-specific content. But if we did this, we wouldn’t be able to use some powerful features of Webstore 2.0.
In order to get the best out of the new features, we need to pull the section in using a particular kind of product template. Let’s look at that first.
The product template
If you’re migrating to Webstore 2.0 from a theme built for Webstore 1.0 (I don’t think anyone actually called it that), you’ll need to make some changes to your product template.
Webstore 2.0 is a lot more modular than before. Essentially, liquid files are being replaced with human-readable JSON files which can be dynamically updated by non-technical Shopify users using the Customise features of Shopify themes.
The file /templates/product.liquid should be renamed to something like product-backup.liquid. You cannot have product.liquid and product.json in the same directory as both perform the same task.
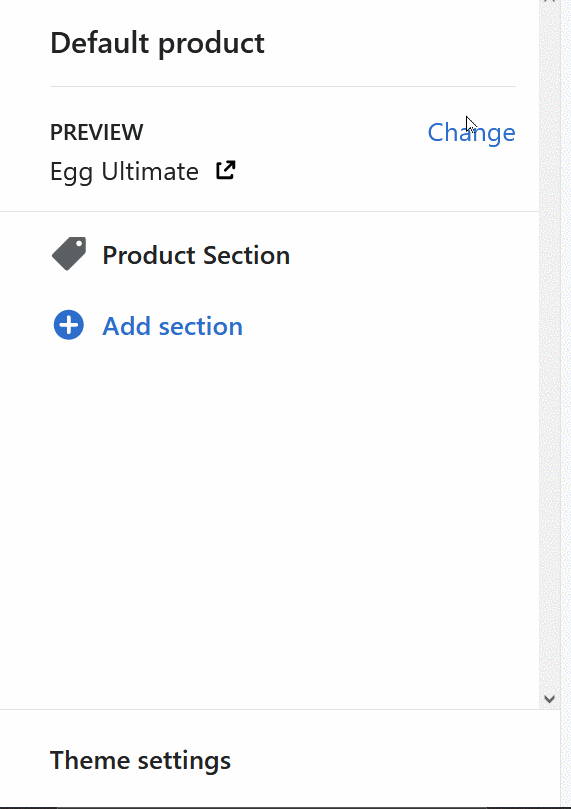
Default product template
product.liquid or product.json are the default product templates used by Shopify. It's still possible to have as many alternate product templates which you could use for specialist products. Any new product will use the default template, until you change it.
The simplest possible product.json would look like this:
JSON names, explained
Name
This text appears in the left hand pane within Shopify, when your content authors are reorganising the page.
Sections
This is where each of your sections are included into the product page. If your existing product template does not include any Shopify sections, simply copy all of the code inside it to a new section, then point your product.json file at this.
Main
This is the alias for the section - it’s reused later in the JSON, under order.
Type
This is the filename of the section. For example, product-section refers to the file found here: /sections/product-section.liquid.
Order
An Array of section aliases, which define the order markup is rendered to the page. Should you rearrange the order of sections during customisation, this would be reflected in the JSON here.
A more complicated example
Let’s assume your current product template has this structure (each of the nested boxes represent sections):
product.liquid
- product-intro-section.liquid
- product-body-section.liquid
- product-footer-section.liquid
A product template in Shopify which imports three section elements
Shopify sections cannot be nested inside each other. This means you can’t simply take all of the markup inside the product.liquid and put it into one new section file.
Instead, the above structure would be represented in product.json like this:
Note that only one wrapper element can be added, which may restrict your markup.
Once this is done, your product page is ready to deal with dynamic sections. Congratulations!

Creating a dynamic section
Remember back at the start, when we created the data for the FAQs and assigned them to a product? It’s time to start dealing with that.
Inside the sections directory, create a new file called faq.liquid (or just look at the example we’ve created in the Mannequin repo).
Checking if the questions and answers exist
The file starts with ten almost identical if statements. Here's the first one:
This sets a series of variables which allow us to show or hide both individual question and answer sets or even the FAQ as a whole.
Once we’ve done this for the ten pairs of metafields, we work out if there’s anything to display at all:
This variable is used to decide if the FAQ panel (and its heading) will display or not. It's used like this:
Adding checks for site-wide content
We’ll go into more detail on this subject in the future, but we also need a bit of code here which checks for any content which doesn’t come from metafields:
This code loops through the content blocks for the current page and finds any which don’t match the metafield pattern.
Avoiding repeating markup
Individual sets of questions and answers might need to be wrapped in specific markup. To avoid repeating that markup multiple times, let’s outsource it to a snippet (or a poor man’s function, as I like to think of it):
Now we can call this snippet ten times and pass it the correct data from within faq.liquid. Here’s how that looks for the data relating to question 1:
Section schema
So far, this is a pretty standard section file. But it’s the schema where the advanced functionality starts to show up.
This has some similarity to the schema for the product template, but with added features.
JSON names, explained
Name
This is what your new section will be called for your Shopify users, when they add it during the customisation stage. Keep it short, or the file won’t validate.
Settings
This configures the fields which will be editable by your Shopify users. If you’ve built a dynamic Shopify home page, you might have seen similar code there.
Type
This defines the type of content being captured. All we’re using the settings for here is to allow the Shopify users to globally change the text inside the heading at the top of the FAQ panel.
ID
Using an ID of title is a hint for Shopify to use the value of this string in the UI. Whatever value your users add will be displayed like this:
A settings block might contain any number of different text fields and Shopify doesn’t know which one is the most important. Using title can ensure that the correct text gets shown to the Shopify user.
Label
The text of the label node will be displayed to the Shopify user when they edit the content.
Default
The default value of the field.
Info
A hint to the Shopify user, as to the purpose of the field.
Blocks
Blocks allows Shopify users to replicate a set of fields. Each of these blocks can have its own settings object which follows the same rules as the main settings object.
Presets
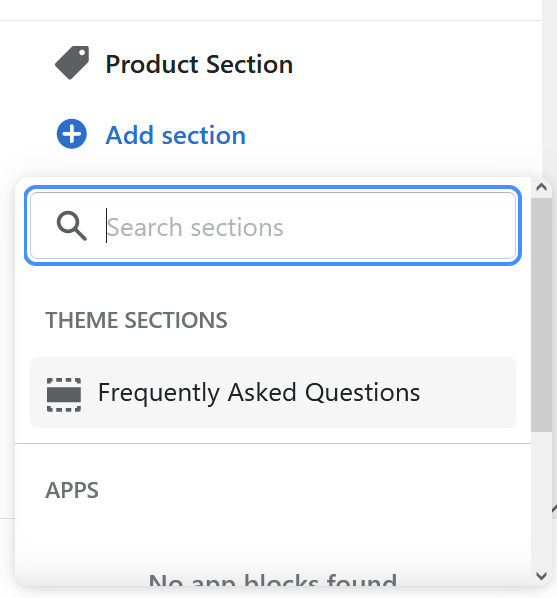
The name you give here will show up when your Shopify users choose a new section to add to a product page. If you don’t specify a pre-set your users will be unable to find your new section.
This is one of the key pieces of Webstore 2.0 functionality - the ability to add new sections to product pages, in the same way as was previously only possible on the home page.

Data scope
It’s worth pausing here to talk about data scope. The metafields we’ve used here are scoped to the individual element - in our case, the product page.
Changes made to pages when customising them in Shopify, however, will occur across every page of that type in the site.
This means that if you rearrange your sections to be in a particular order on one product page, that same order will be repeated on every other page which uses the same template.
The same goes for data - if we added content to the FAQ section within customisation, that information would show up on every page of our site.
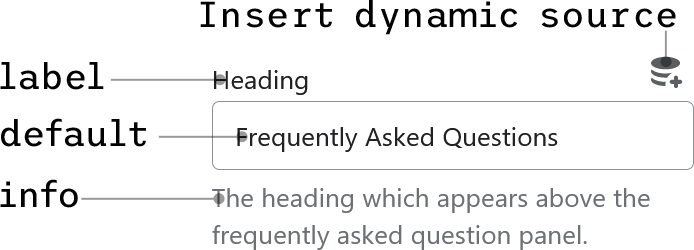
However, Shopify allows us to use a hybrid of the two, by using dynamic sources. Within the customisation settings of the product page, add the FAQ section and click on the first block:
This links the metafield values we added at the start to the FAQ section, allowing them to be displayed directly to the customer.
Now continue the process above for the other nine questions. But you don’t have to stop there: if you add in content which does not come from dynamic content, you could have questions and answers which appeared against every single product on your site, saving you from adding boilerplate questions such as Can I return this product? to every single product.
Note that by default, your product-wide questions will only appear if there are any other metafield questions added to your product. If you want the product-wide questions to appear even when there are no product specific questions, you should make a small change to the logic of faq.liquid:
Assign faq_exists to true, to ensure that the default questions appear for every product on the site.
Next steps
Your products should now display frequently asked question panels, if the content for them exists. Congratulations!
Metafields can do so much more, but the process will involve most of the steps above. For example, you could add a product chooser metafield and allow your content authors to fill out a related products panel. Or make it even smarter, so it finds related products based on similar tags, but these will be used only if your authors fail to specify alternatives.